We've already talked about how to go about upgrading the RAM on the Dell Inspiron 15 3511. Today, it's time for us to tackle how to upgrade the storage on this laptop. An upgrade we know many people will be eager to perform and fortunately for you it's just about the easiest upgrade you can take on next to the memory installation.
Overall, with the Dell Inspiron 15 3511, you can choose between inserting another SSD or HDD unit in the 2.5-inch SATA slot or you could also opt for an NVME M.2 2280 SSD unit. In any case, today we're going to explain to you how to go about doing both upgrades. Let's get on with it.
How to upgrade the storage on the Dell Inspiron 15 3511
What type of storage unit may I use?
First off, we should point out that you can upgrade both the onboard storage as well as insert an SSD or HDD in the 2.5-inch SATA bay located on the side of the battery. If you're looking to replace the NVME unit on the laptop then you're going to have to clone your drive and get yourself an NVME M.2 2280 SSD unit. You can get as much as a 2 TB unit.
If you don't want to clone your drive and you care that much about getting the fastest storage capacity available then you can get yourself a 2.5-inch SSD SATA unit. The main difference between these two storage types is that the NVME unit can read/write at speeds of 3000-3500 MB/s whilst the 2.5-inch SSD SATA unit will deliver speeds of up to 500 MB/s. That and the fact that changing the onboard storage also means having to clone the drive, which is not the case when using a 2.5-inch SSD SATA.
In any case, in this step-by-step tutorial about how to upgrade the storage on the Dell Inspiron 15 3511 we're going to walk you through both options.
How to upgrade the Dell Inspiron 15 3511 storage?
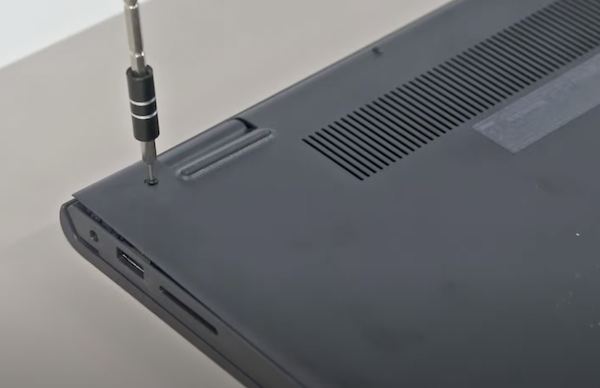
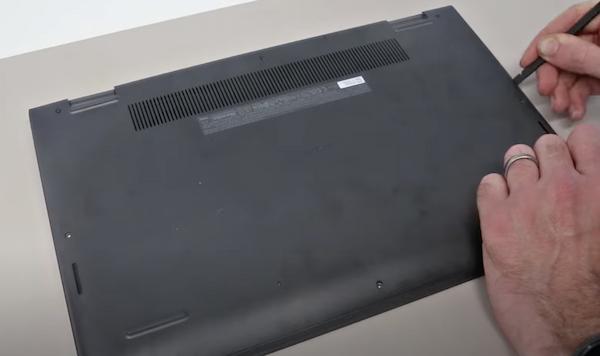
Step 1: Before doing anything you need to make sure the laptop is turned off and disconnected from the power supply. Once that's done, place the laptop on its back and start removing the screws on the bottom and on the sides of the laptop. Leave the top screws for the end since these screws act as a sort of lever of some sorts that help release the case from the chassis as you can see in the following picture.
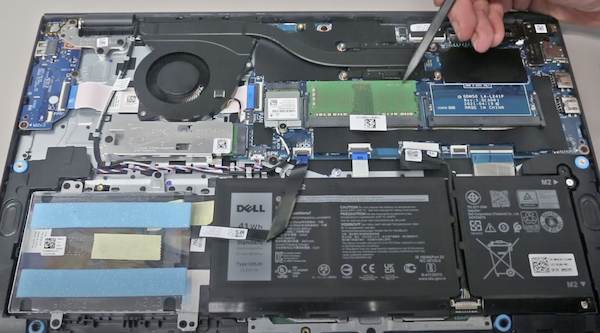
Step 3: Now that you've removed the case you can contemplate the internals of the laptop. We would recommend at this stage that you disconnect the battery. This step isn't strictly necessary but if you want to do it it's not going to hurt and could prevent an uncomfortable small electrical discharge.
If you're going to upgrade the NVME storage
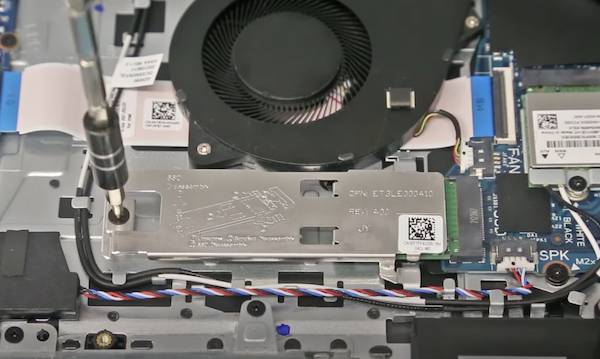
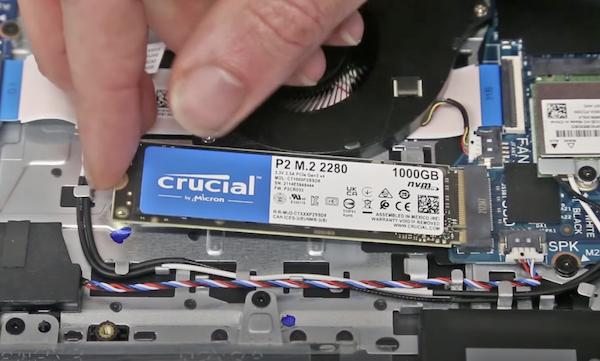
Step 4: If you're going to upgrade the NVME storage what you're going to do is remove the screw attaching the heat shield located atop the 2.5-inch SATA bay remove the 2230 unit located within the laptop and replace it with your NVME M.2 2280 SSD unit like so:
 |
| Remove the heatshield |
 |
| Insert the new M.2 2280 unit at a 45-degree angle |
Step 5: Once you've inserted the NVME unit press down and place the heat shield on top of the unit as it was on the previous one.
If you want to upgrade the 2.5-inch SATA bay
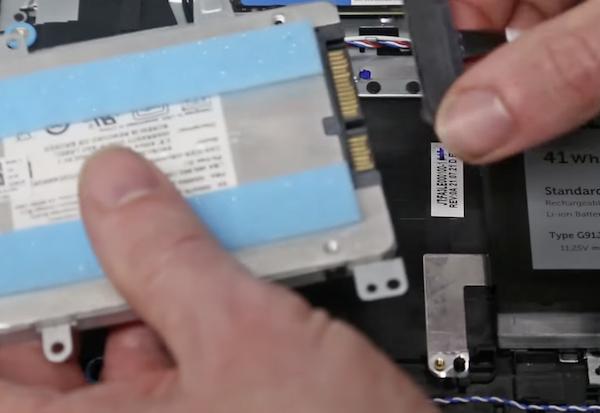
Step 4: If you're going to upgrade the SATA bay what you want to do is remove the screws attaching the bay to the laptop like so:

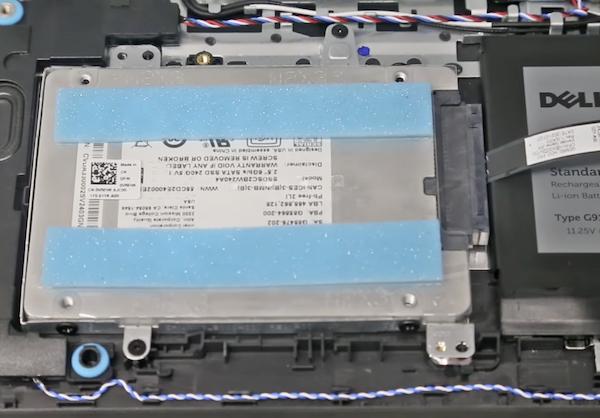
Step 5: Remove the screws located below the tape on the silicon tray. These are the screws you're going to use in the next step to make sure the storage unit is held nice and tight.

Step 6: Make sure you tighten the screws on the side of the silicon trey once the storage unit is placed inside the trey.

Step 8: Finally, insert the storage on the 2.5-inch bay and screw it to its place as it was before you removed it to insert the storage unit in the tray.
Step 9: Now that you have officially finished performing the upgrade make sure to connect the battery back on if you've disconnected it to perform the operation. Then attach the chassis back on and turn the laptop back on.
If you've cloned your drive before then everything should work as planned with your new NVME M.2 SSD unit. In any case, you're going to have to head over to "Disk management" where you're going to go ahead and format the new drive and create a new volume so that you can use the new storage installed on your notebook.
And that's it. As you can see it's not the easiest upgrade in the world, but it's far from being the hardest. Now you never have to worry about running tight on storage space.