 |
The HP 15-dw0083wm is a solid entry-level laptop. It features a powerful Intel Celeron N5000 processor, 128 GB of internal storage, a 15.6-inch HD display, and 4 GB of RAM.
Now, here's the kicker – to really juice up this bad boy, you might want to think about upgrading the RAM. Trust me, it's gonna make a big difference!
So, what's the deal with this RAM upgrade? Well, more RAM means you can run multiple apps at once without your laptop getting all sluggish. It's like giving your system a boost and making multitasking a breeze.
Whether you're surfing the web, working on big docs, or even gaming, upgrading the RAM on the HP 15-dw0083wm is going to be truly beneficial for your day-to-day tasks and it's not even an expensive or complicated process to perform.
In this tutorial, we'll walk you through everything you need to know and every step you need to take to make your upgrade a success. Ready? Let's get the screwdriver!
What Type Of RAM do I Need? How Much RAM can I Install on the HP 15-dw0083wm
Before you dive in, let's go over what kind of RAM you need. Specifically, this laptop supports the DDR4 PC4-25600 3200MHz Non-ECC SODIMM memory type.
It's not the latest standard in RAM, that would be DDR5. However, for day-to-day use on an entry-level laptop that's mainly going to be used for basic computing such as browsing the internet, streaming movies, editing spreadsheets, and doing some light coding it's more than enough.
Okay, here's the deal though – the laptop comes with 4GB of RAM installed, and you can only upgrade up to 8GB since it only features one available RAM slot. But hey, even with that upgrade, you'll notice a major improvement in performance. Not quite like a high-end laptop, but it'll still rock! Therefore you should get yourself a compatible 8 GB module of RAM to move forward with the upgrade since it's basically the only option available on this laptop.
Now, let's get down to business and upgrade that RAM!
Step-By-Step RAM Upgrade Tutorial for the HP 15-dw0083wm
Step 1: Prep for the Upgrade
You know the drill – backup your stuff, just in case (though honestly, you'll probably be fine). Power down your laptop and unplug it. Take off any peripherals like a mouse or flash drive. You're going to need a screwdriver and possibly something like a guitar pick to help you open the laptop up.
Step 2: Open Sesame!
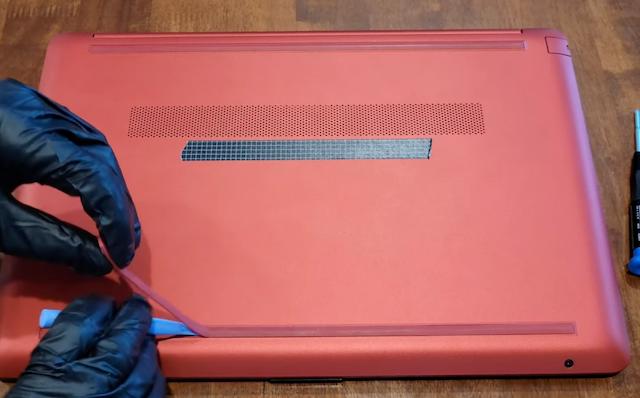
Flip your laptop over and unscrew those bottom case covers. If you need a hand, use the aforementioned guitar pick or a credit card that can help you pry it open (no knives, folks, we don't want any accidents!). You're going to need to remove the strips located at the bottom of the laptop to access the screws that are holding the bottom case to the rest of the body of the laptop. Remove them like so:
Step 3: Out with the Old
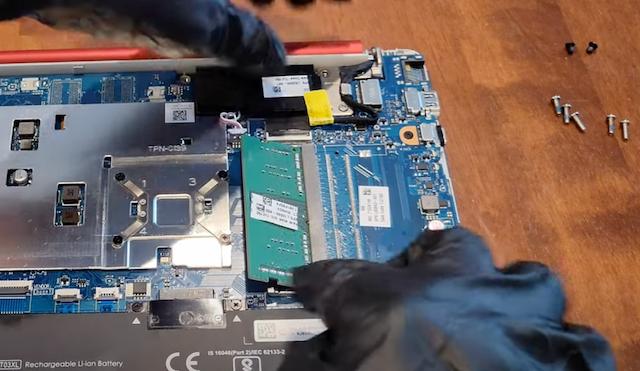
Once you have removed the screws and separated the bottom case from the rest of the laptop you'll need to locate the RAM slot and gently unclip the current RAM module.
It should pop up at an angle, and then you can pull it out. If you've never pulled out a RAM module here's a gif that should help you see how it's done. However, all you need to do is pull on the levers located on the sides in an outward fashion, this will release the RAM module at a 45-degree angle.
Step 4: Bring in the New RAM
See that notch on your shiny new 8GB RAM module? Line it up with the ridge in the RAM slot. Slide it in at the same angle the old RAM came out as if you were landing a plane at a 45-degree angle.
Here's another image to help you better visualize how the pins should be aligned.
 |
| Gently press down on the RAM module until you hear a "click" |
Step 6: Put It All Back Together
Screw that bottom case back on and put those covers back in place. It's not mandatory, but it looks nicer.
Step 7: Power Up and Check It Out
Fire up the HP 15-dw0083wm and make sure the new RAM is recognized. You can check it through the "System Information" app on Windows or just hit up the Task Manager (Ctrl + Shift + Esc) and look under "Performance" and then "Memory." You should be able to see the new amount of RAM you've upgraded towards.
Boom! You did it! Your HP 15-dw0083wm is now RAM-packed and ready to rock. Double the RAM means double the fun – smoother multitasking and a more powerful performance. Enjoy the upgrade!


