If you're a hardcore multitasker chances are the onboard memory most laptops feature these days simply won't cut it for your needs. Such is the case of the Dell Latitude E5570, an incredibly popular laptop that shipped with either 4 GB or 8 GB of memory.
However, unlike some of its contemporaries such as the Dell Latitude E7450, this particular model allows us to go all the way and upgrade to a massive 32 GB of RAM. Today we're going to walk you through the process of upgrading the RAM on the Dell Latitude E5570 so you can make the most out of your laptop. Let's get on with it!
Dell Latitude E5570 RAM Upgrade in 5 minutes or less
What type of RAM do I need? How much RAM does it take?
If we take a look at the specifications for the E5570 we can see that the onboard memory is
DDR4 SDRAM clocking at 2133 MHz with 260 pins. For best results we typically recommend using a type of memory that's the most similar to the one the laptop shipped with by default.
As far as the maximum amount of RAM allowed on this model. You've got two RAM slots, both capable of
housing up to 16 GB of compatible RAM each. That makes for a
total RAM capacity of 32 GB which might be a lot for some of you and enough for the more hardcore users out there.
How much RAM should I get?
You should ideally upgrade to at least 16 GB with
two compatible 8 GB modules. For most users out there an upgrade to 16 GB should provide plenty to be able to comfortably work with numerous programs at any given time, have several chrome tabs open and in general get a lot of work done.
However, if you're working with
very RAM-intensive software such as photoshop, or Adobe Premiere then you would be better off with upgrading to the maximum 32 GB capacity by getting
two compatible 16 GB modules.
In any case, most laptops feature removable RAM sockets these days so if you find yourself switching laptops down the line you can always remove the RAM you bought and place it onto your new laptop to maintain your 32 GB of RAM. This way you're not only extending the life of your current E5570 but also your future device.
Should I replace the onboard RAM or only use one slot?
This is a question we get asked quite a bit. The short answer is yes. The best option will always be to replace the current RAM module and get two new compatible RAM sticks. This is due to the fact that each RAM module will have different specifications and to make 100% sure that your laptop is working in dual-band RAM then the best option is to purchase two identical modules.
Otherwise, if you get RAM of different sizes or different specs you probably won't get a dual-band RAM, and even though you will technically have more RAM you won't really notice it because it will still be lagging in performance compared to having two identical modules that can split the workloads amongst themselves.
How Do I Upgrade the RAM on the Dell Latitude E5570
First off you're going to need a Philips screwdriver and either a flathead screwdriver or a pinch of some sort that you're going to use to pry open the laptop's lower case.
Step 1: Make sure your laptop is turned off and isn't connected to a power source. Turn the laptop upside down and remove the screws attaching the lower lid to the body of the laptop. Now use the flathead screwdriver and pull the case outwards from the edges located on the top half.
Step 2: Though not 100% necessary, it's highly recommended that you disconnect the battery of the laptop before moving forward with the swap. The battery is the big black block located right below the RAM slots.
Step 3: Locate the RAM slots. Once you've located the RAM slots you need to remove the onboard RAM. To do so simply click on the clasps located on the side of the RAM slot and push outwards. This will release the module at a 45-degree angle. Remove the onboard RAM. Here's an example using chopsticks but you can use your fingernails.
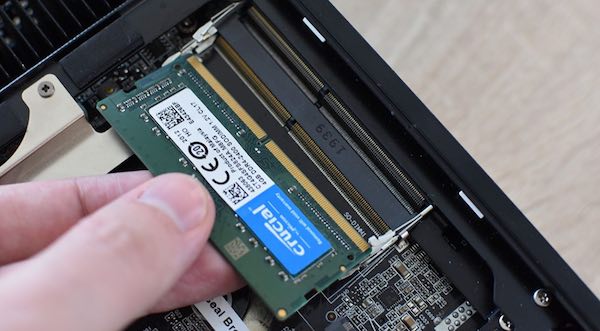
Step 4: Now that you've removed the RAM you need to insert the two modules you've bought for it. To do so simply insert them at a 45-degree angle in the RAM slots in a way that the notches of the module and the notch of the slot align to make sure you're placing the RAM properly. Here's an example of what that looks like:
 |
| The RAM notch aligns with the one of the slot (example picture, not of this model) |
Step 5: Press down on the RAM until you hear a click, that's the clasps taking on the RAM. Screw the lid back on (after connecting the battery again if you've disconnected it), turn on your laptop and you should see a message that says that the memory on your laptop has changed. Afterwards, if you head over to device configuration you should be able to see the installed RAM.
And that's it. Pretty easy huh? Told you it was going to be a rather straightforward procedure! Enjoy your E5570 with the newfound freedom of being able to multitask to your hearts desire, you've earned it!


