MSI is renowned for its top-notch gaming laptops and the latest model within its lineup is no exception to this. We're talking about the MSI GL66 (Pulse) laptop.
A model that comes with a diverse range of RAM configurations, going from your most basic 8 GB of RAM to the top of the line with 64 GB of RAM onboard. However, since we know that many users will purchase a model with less RAM and then upgrade it themselves we wanted to create a quick guide on how to upgrade the RAM on the MSI Pulse GL66 in 5 minutes or less. Let's get on with it!
MSI GL66 RAM Upgrade Tutorial
What type of RAM does the MSI Pulse GL66 take? How much RAM can I set up?
First off you need to know the type of RAM that this laptop takes. Specifically, the GL66 works with the
DDR4 PC4-25600 3200 MHz NON-ECC SO-DIMM memory type. As far as the amount of memory this laptop will take, you can go ahead and upgrade it to a maximum of 64 GB of RAM,
32 GB on each one of its two available slots.
From that standpoint, we would recommend at least upgrading to 32 GB with
two compatible 16 GB sticks. Or if you want to go all out and you know you're going to be doing some RAM-intensive tasks then you could always
get a couple of compatible 32 GB sticks of RAM for a total of 64 GB. This last option is a bit on the expensive side of things but it all depends on the usage you plan to give your MSI Pulse GL66.
How Do I Upgrade the RAM on the MSI GL66?
Step 1: Turn the laptop off and make sure it's disconnected from the power supply. We can't stress this enough and that's why we always make a point of mentioning this as the first step. If you're also working on an antistatic mat or some
antistatic gloves that's also preferable to avoid any static electricity. Though a RAM upgrade shouldn't give you any static in theory.
Step 2: Place the laptop upside down and remove all the screws located at the bottom of the laptop. Afterward you want to grab your pry to gently open up the laptop case like so:
Step 3: Once you've removed the case you'll be able to quickly spot the RAM. It's this set of covered slots. As you can see they're piled on each other.
Step 4: Remove the black mantel and pull outwards on the side of the RAM module until the clips on the RAM slot click and release the RAM at a 45-degree angle. Now you're going to remove the onboard RAM and insert your RAM.
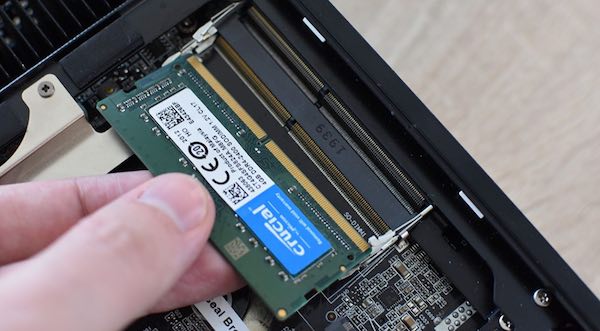
Step 5: Insert the RAM at a 45-degree angle, the same way the RAM slot released the onboard memory module. To know how to place the RAM correctly all you need to do is make sure the notch on the slot and the notch on the module align. Here's a picture of what that should look like. Start with the RAM module located at the bottom first.
Step 6: Press down on each RAM module and you'll hear a click. That's the sound of the RAM module snaps into place. Of course, before pressing down make sure you've inserted the RAM correctly within the slot. Apply soft but firm pressure to make sure the RAM is correctly inserted onto the slot of the MSI GL66.
Step 7: Place the lid back on, insert the screws and turn your laptop on. Now, under "Device Configuration" you should be able to see the new amount of RAM you've upgraded to. It's also possible that the system alerts you to a change in memory when you boot up, this is also fine.
As you can see, the whole process is fairly straightforward and now you've quickly and easily managed to increase your multitasking capabilities substantially. We really hope you went with the 64 GB upgrade to make the most out of the GL66 but if you went with 32 GB you're still going to be enjoying the benefits of a computer that has more than enough RAM for most use cases.


