A while back we talked about how to upgrade the RAM on the Acer Aspire 5 A515-43-R19L. The Acer Aspire 5 A515-43-R19L has quickly become a staple of the best-selling student laptops thanks to its balanced specs and competitive price point. Today, however, we're here to teach you how to upgrade the storage on this notebook, something many of you might be considering due to the fact that the laptop only features 128 GB worth of storage space.
It's a relatively straightforward procedure for which you are going to need the SSD/HDD caddy screws that come with the laptop, as well as the connector and ribbon cable that you'll find within the notebook itself. Without further ado, let's get started with the upgrade!
How To Upgrade the Storage on the Acer Aspire 5 A515-43-R19L
What type of storage do I need?
In order to install more storage on the A515-43-R19L, you're going to need to get a compatible storage unit. In this particular case, Acer leaves a slot open to insert a 2.5-inch SSD or HDD. You're never going to see us recommend getting yourself an HDD, simply because read/write speeds are roughly 3 times slower than an SSD whilst the price difference is not all that noticeable.
There's also the option of swapping out the M.2 NVME PCIe SSD unit. However, to do so you would have to clone the drive which is a whole process in and of itself.
How Do I Install an SSD on the Acer Aspire 5 A515-43-R19L?
Step 1: As we always say, the first step is to turn the laptop off and make sure it is disconnected from the power source to avoid getting any sort of electrical discharge. It also never hurts to do this whilst wearing anti-static gloves.
Place the laptop upside down and start removing the screws attaching the bottom cover like so:

Now, using a prying tool of some sorts, such as a guitar pick or even a credit card, you will proceed to gently open up the laptop from the sides like so:

Step 2: Once you've removed the bottom cover you're going to go ahead and disconnect the battery for safe measure. We would recommend once again using the plastic prying tool to do so as to avoid using any kind of electrical conductor.

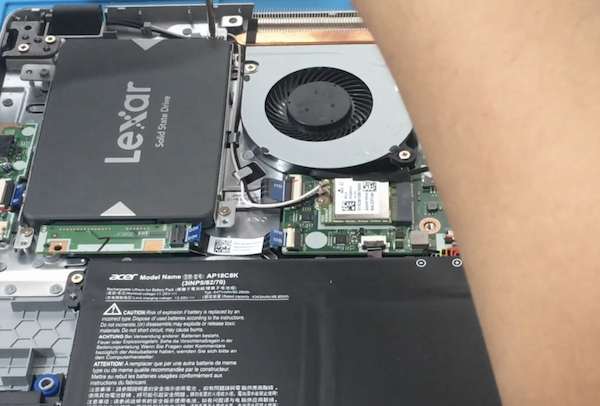
Step 3: Now go ahead and remove the SSD caddy located above the battery.

Step 4: Now remove the connector which you will later use to connect the SSD or HDD to the motherboard.

Step 5: Remove the small ribbon cable located right below the SSD caddy. It's glued in there so try and be gentle so as not to break it. You're going to unfold the cable and connect it to the connector located just above the battery and below the wireless card. Important: you need to attach to the motherboard the part of the cable that reads "MB", which is short for motherboard in this case


Step 7: Now insert the SSD into the SSD caddy and use the screws that came with the laptop to tighten the grip of the SSD like so:

This is what it should look like with the ribbon cable connected to the motherboard on one end, to the connector on the other end, and the connector connected to the SSD on the bottom.
Step 9: Finally, don't forget to reconnect the battery you've disconnected in step two once again making use of a prying tool of some sort. Then place the bottom cover back in its place and re-introduce the screws. Turn the laptop on and after you've formatted and created new volumes with the new storage unit you're going to be good to go.
As you can see this isn't the easiest process and upgrading the RAM is certainly easier than adding more storage to the Acer Aspire 5 A515-43-R19L but it's not rocket science either. A relatively simple procedure that shouldn't take you much more than 10 minutes or so.