We've recently talked about how you would go about and upgrade the RAM on the ASUS ROG Strix G15 G513. However, while this may be a top priority for many users, you might also be interested in upgrading the storage on this unit. Specifically, unlike most mid-range laptops, this gaming laptop offers the user an empty NVMe slot to easily expand the storage. Today I'm going to walk you through the fundamentals of how to go about and do just that.
How to Install More Storage on the ASUS ROG Strix G15 G513
What type of storage may I use?
This particular lineup features two NVMe slots, one that's already taken by the onboard storage and an empty slot for you to install more storage. Specifically, you're going to want to get yourself an M.2 PCIe NVME storage unit.
You can get units that range from 250 GB to 2 TB, though the latter is quite expensive and we recommend our readers compromise with a 1 TB unit that doesn't have an abusive price point.
A unit such as the Samsung EVO 980 with a 1 TB capacity would be our recommendation as it has excellent read/write speeds and superb reviews.
How Do I Upgrade the Storage on the Asus ROG Strix?
Step 1: Before you get your screwdriver make sure the ROG Strix G15 is fully turned off and disconnected from the power supply. Once you've made sure of that, place the laptop upside down and remove the 11 screws attaching the bottom lid to the chassis. Later grab a prying tool of some sorts - such as a guitar pick or a credit card, not a screwdriver - to gently but firmly separate the bottom lid from the chassis.

You don't want to be too hasty about this since there is an LED strip attaching the lower case to the chassis so be careful to not remove the bottom case before disconnecting the LED strip.
Step 2: Now that you've managed to pry open the laptop you'll notice the onboard NVMe storage unit on the left side of the RAM slots. Where it says SSD2.
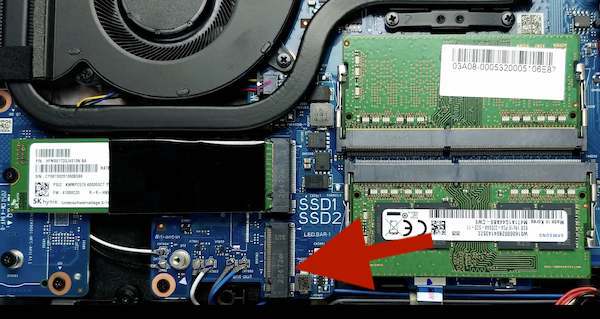
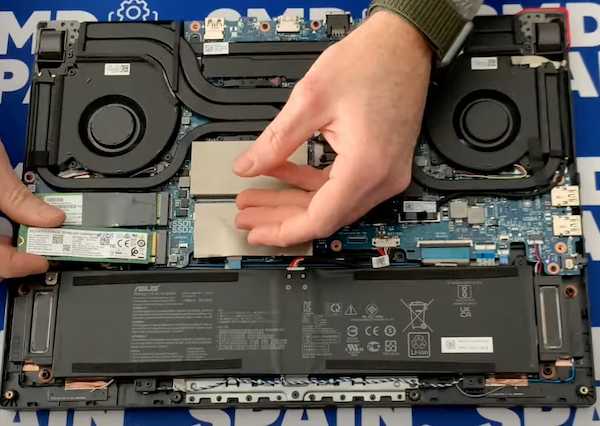
Step 3: Now you're going to go ahead and remove the screw that's located on the far end on the NVMe slot. You're going to use this screw to attach the NVMe unit to the motherboard. Afterward you're going to insert the NVMe unit at a 45-degree angle onto the storage slot like you can see in this example image:
Step 4: Finally, grab the screw you removed in the previous step and use it to hold down the NVMe unit like so, making sure the storage unit is properly inserted into the slot.
