When it comes to gaming laptops there are several factors that contribute to them being a success. We generally focus on the processor, graphics card, and RAM. However, one aspect that's often overlooked is the storage. Having enough storage will not only help for a snappier performance if you've saturated your current drive with data but it will also allow you to store more games as well as your media library.
Yesterday we walked you through a step-by-step guide on how to upgrade the RAM on the Lenovo IdeaPad Gaming 3 82SB0001US. Today we're going to go in a different direction and we're going to help you upgrade the storage. Specifically, we're going to swap out the 2242 NVMe PCIe SSD for a bigger 2280 NVMe PCIe SSD.
The Lenovo IdeaPad Gaming 3 82SB0001US is a great laptop. It packs a solid 15.6-inch display with a 120 Hz refresh rate, an AMD Ryzen 5 6600H CPU, and an NVIDIA GeForce RTX 3050. However, RAM is a bit tight for a gaming laptop with just 8 GB and storage is very tight with a meager 256 GB of SSD storage. It's a great laptop with a killer price point but if you want to get the most out of it we would certainly recommend upgrading the storage. Now, we set out to do just that.
How To Upgrade The Storage on The Lenovo IdeaPad Gaming 3 82SB0001US
The first thing you need to do is buy the right storage format. We're going to do the upgrade using a
2280 NVMe PCIe SSD form factor but you could also use a
2242 PCIe which is the one that's currently installed. We'll walk you through both processes.
Personally, I would
recommend upgrading to 1 TB, it's a substantial improvement over the 256 GB that the laptop currently has and the price for a compatible
2280 1TB unit has never been cheaper.
Once you have your storage unit bought you can set out to perform the upgrade.
Step-by-step NVMe Upgrade on the Lenovo IdeaPad Gaming 3 82SB0001US
To do this you're going to need a screwdriver and we would recommend you also get your hands on a prying tool of some sort - for most people, it's a guitar pick -. However, on this laptop, the prying tool isn't strictly necessary because it's relatively easy to gently remove the back cover.
Before you do anything turn the laptop off and disconnect it from the power source. You can't do a storage upgrade without having the laptop completely turned off. That means no hibernation or sleep mode.
You would also be advised to have
Windows 10 or Windows 11 on a bootable USB for you to
re-install the operating system. It also goes without saying that when you do a storage upgrade you are removing the storage unit where all your data is stored so a
data backup is essential if you don't want to wipe the slate clean.
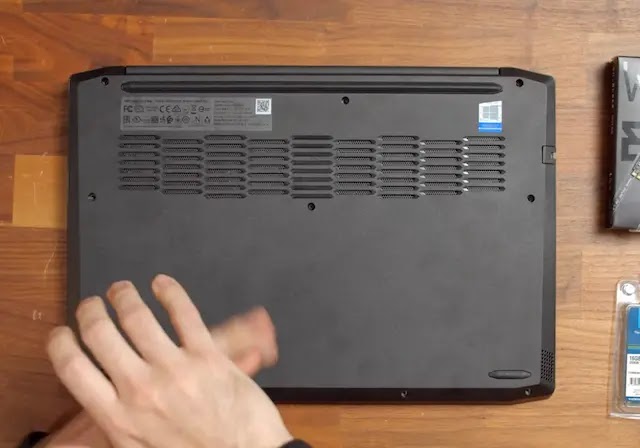
Step 1: The first thing you're going to do is to place the laptop on its back and remove all the screws that are currently attaching the bottom case to the chassis of the laptop.
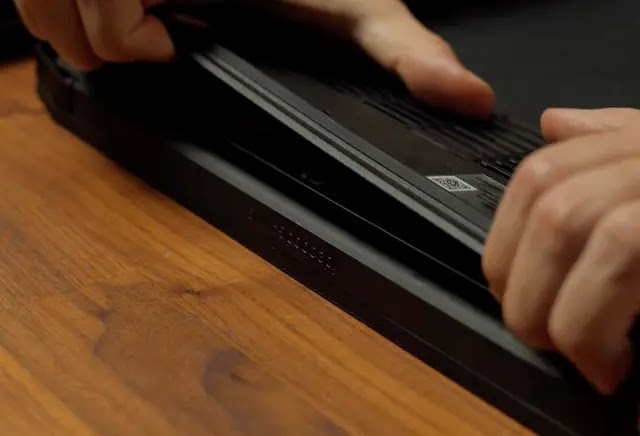
Step 2: Once you have removed the screws, fortunately, they are all the same size. You'll need to go ahead and pry open the laptop's back cover. You could do it manually but you can also do it with the help of a prying tool. It should be noted that the prying tool can't be anything metallic since you would risk damaging the internal components.
Step 3: You now have access to the laptop's internals. At this stage, we would recommend that you disconnect the battery that's connected to the motherboard.
You'll notice that the battery (the big black thing at the bottom of the laptop) is connected to the motherboard. Remove the connection to disconnect the battery.
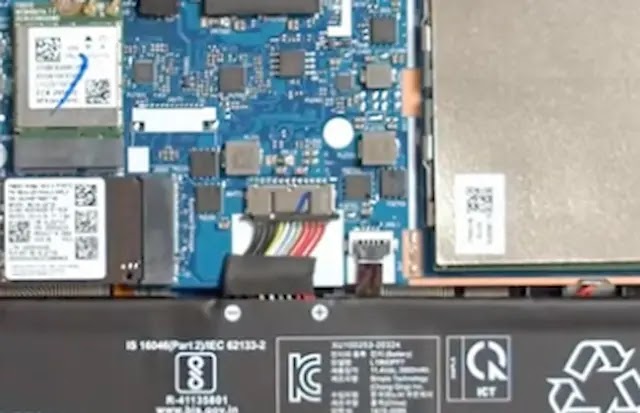 |
| That's the connector you need to disconnect |
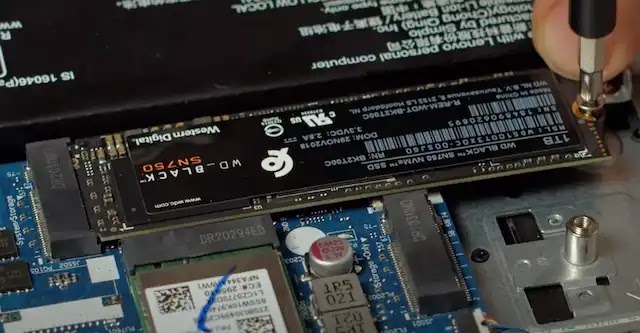
Step 4: Now that you've done that you'll need to
remove the NVMe drive that's housed on the laptop to replace it with the new one. To do this simply grab your screwdriver and unscrew the side of the drive that's attaching itself to the motherboard. After you have done that the storage module will lift at a 45-degree angle, at which point you can "wiggle" the drive right off the connector.
Step 5: Now we've hit a crossroads depending on what you want to do. If you want to replace the current storage unit with another 2242 unit then all you need to do is grab the unit you've bought, insert it at a 45-degree angle making sure the pins align, and screw it in place.
If you've opted for a 2280 NVMe storage unit then you'll have to follow a couple of extra steps. In this case, once you removed the screw that's attaching the 2242 NVMe you're going to introduce the 2280 NVMe in the same slot at a 45-degree angle making sure the pins align. Press down and screw it on the other end where you'll see there's a "screw holder" if you will.
Step 6: Once that's done you'll need to re-attach the battery connector that you disconnected at the beginning of this tutorial. Re-attach the bottom case with the screws you took out and boot up the laptop. You'll need to use the Windows USB drive you've previously purchased to be able to re-install Windows, after that you can go ahead and recover the data you've backed up before starting the upgrade.
And that's it! You have successfully upgraded the storage on the Lenovo IdeaPad Gaming 3 82SB0001US. Enjoy all the new possibilities that more super-fast storage brings to your laptop!