When it comes to gaming laptops having enough memory is a pretty big deal. However, even though this is the case, most manufacturers will ship their laptops with a fairly limited amount of RAM. Case and point the Asus TUF Gaming F17 FX706LI-RS53. This is a stellar laptop at a killer price with great features such as a 10th generation i5 processor and GTX 1650 Ti Graphics card, however, it only comes with 8 GB of RAM, which is really not even close to enough for an optimal gaming experience.
Luckily for us, however, we can upgrade the memory on this laptop in a rather simple procedure that shouldn't take you much more than 5 minutes and will deliver you a massive boost in performance. Today we're going to walk you through the process step-by-step on how to upgrade the RAM on the ASUS TUF Gaming F17 FX706LI-RS53.
ASUS TUF Gaming F17 FX706LI-RS53 RAM Upgrade Tutorial
Before we get too excited and jump over to Amazon and buy the first RAM unit we see, we're going to need to go through some basics to make sure you get your hands on the best RAM for your laptop since not every laptop works with the same memory modules.
What type of RAM does the Asus TUF Gaming F17 FX706LI-RS53 take? How much can I install?
As with most gaming laptops, this notebook makes use of
DDR4 PC4-25600 3200MHz Non-ECC SODIMM dual channel memory modules. That means that it uses the latest generation DDR4 RAM clocked at 3200 MHz with the SODIMM form factor. It's important to know this and buy this type of module to make the most out of the laptop's performance.
This laptop already comes with 8 GB, but unlike the
Acer Aspire 5 A515-56-50RS RAM Upgrade, there's no memory soldered onto the motherboard. In fact, it features
two 4 GB units that you should remove to perform the upgrade.
We can't recommend a generic amount of RAM since every user is different and they will use the laptop for more or less RAM-intensive tasks. However, we can say that a pretty safe bet is to upgrade to 32 GB if you're going to be using it for gaming and graphic design. 64 GB would be even better but depending on the usage you're going to give the laptop it might not be worth the upgrade to be perfectly honest.
Step by step upgrade tutorial
For this upgrade, you're going to need a prying tool of some kind (it can be a guitar pick), as well as a screwdriver. As a precautionary measure you could make use of
anti-static gloves but that's not strictly necessary.
Before doing anything make sure the laptop is turned off and disconnected from the power source.
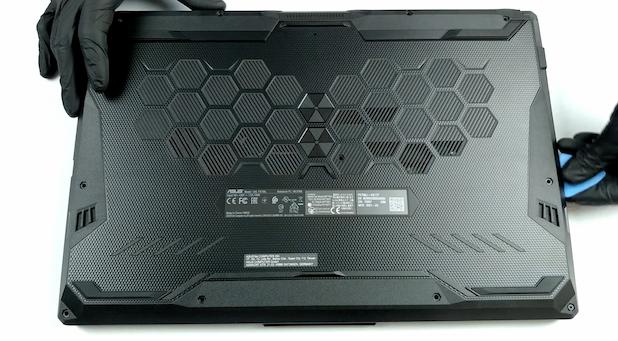
Step 1: Place the notebook on its back and remove all the screws attaching the bottom case to the chassis of the laptop. Afterward, make use of the prying tool and search for a small cavity located on the lower right-hand side of the notebook. That's where you're going to introduce the prying tool to start detaching the bottom case.
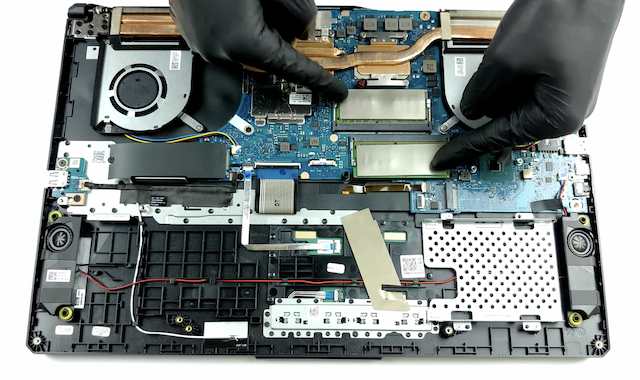
Step 2: Now that you have removed the case you will notice the two RAM slots covered by a black heat shield.
Step 3: Remove the black shields and you will see both RAM modules inserted onto the RAM slots.
Step 4: Go ahead and remove the modules since you're going to replace them with the modules you've bought. To do that you're going to need to pull outwards on the metallic clasps located on the sides of the RAM slots. Once you do that then the RAM module will be released at a 45-degree angle and that's how you should go ahead ans retrieve it.
Step 5: Finally, insert the modules you've bought in the same fashion as you retreived the modules that came with the laptop. That means inserting them at a 45-degree angle as if you were landing a plane while making sure that the pins and the notch align.
Here's an illustrative image of what that would look like - obviously this image is from another laptop and only serves to show how the RAM module should align with the memory slot-.
Step 6: Once the memory modules have been properly inserted onto their corresponding slots, go ahead and press down on them. When you hear a "clicking sound" that's the sound of the metallic clasps attaching the RAM to the system and it means that you have successfully introduced the memory module.
Step 7: Finally, go ahead and re-attach the bottom case to the laptop and turn the laptop on. Don't concern yourself if it takes a bit longer than usual to boot up, this is perfectly normal as the laptop's BIOS is recognizing and integrating the new memory modules onto the system.
Once the laptop is booted up you should be able to see a prompt that tells you that the memory was succesfully installed. If that were not the case then simply head over to > Device Specifications and once you're there you can see the amount of installed RAM which should reflect your new amount of memory.
And that's it! Congrats!